How to build a video wall from ordinary screens
Two, three or twelve TVs showing one picture, with video and motion running across all of them. What you need, how to hang and design it, and how the screens stay in step.
The Wunderframe team 6 min read
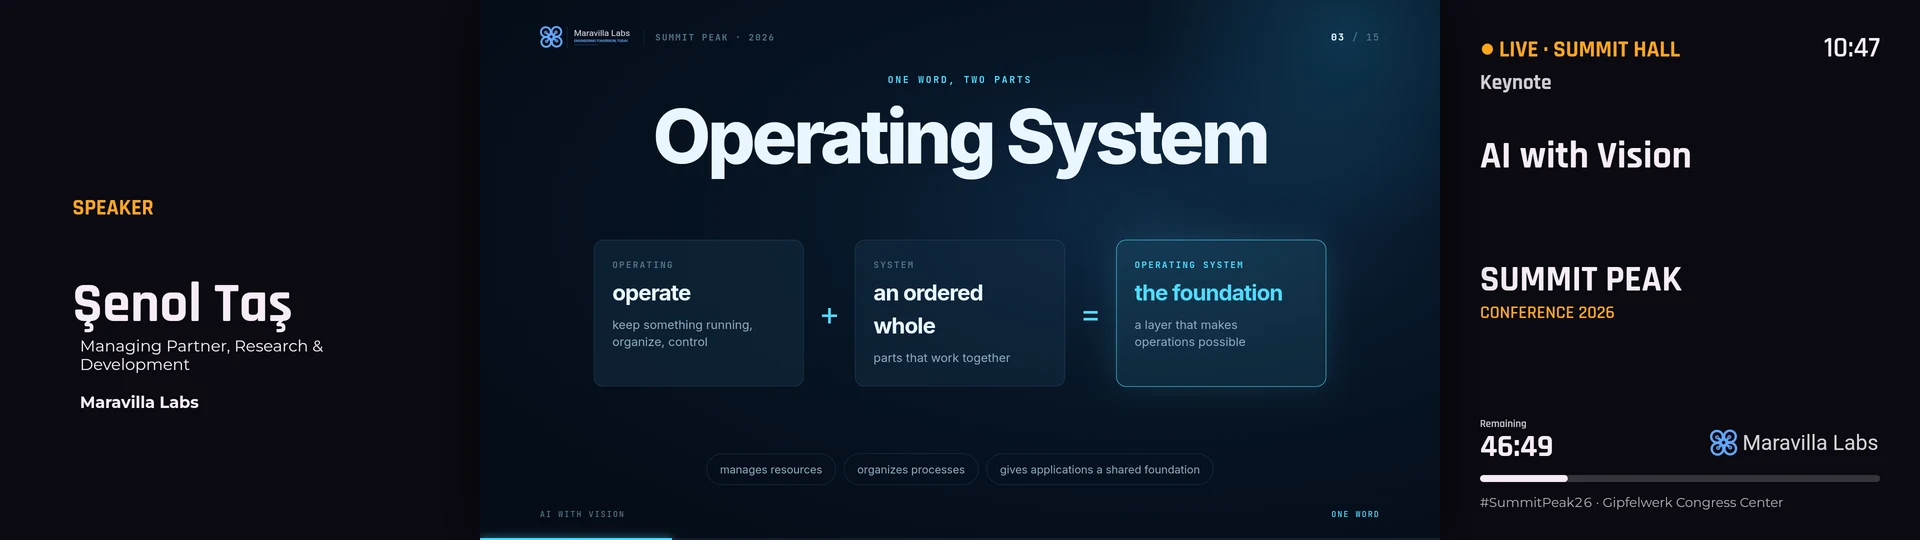
A video wall used to mean special hardware: a controller box, matched panels from one supplier, and a technician to set it up. For most events and venues that is more than you need. Two or three ordinary TVs side by side, each with a small player behind it, can show one picture across all of them: a title that flies from one end to the other, a clip that spans every screen, a keynote with the speaker on one side and the slides in the middle.
This post covers what you need, how to hang the screens and design for them, and how the screens stay in step. The details are in the walls documentation, linked from each step below.
What a video wall is, and what it is not
In Wunderframe a video wall is one stage whose screens together show one picture. You design one big canvas. Every screen plays all of it and shows only its own part, so anything that moves across the canvas moves across the screens.
That is different from a row of screens that each show something of their own but change at the same moment, such as the menu boards above a counter. For those you make a synced group instead. Both keep in step the same way.
What you need
- Screens. Any TVs or monitors. The same model makes the seams easiest, but it is not required: a portrait screen can sit beside two landscape ones.
- A player per screen. An Android TV box, a Raspberry Pi, a PC with the desktop app, or simply a browser. The apps are the better choice for a wall: they play video natively, keep playing when the internet drops, and can talk to each other directly on the local network. (Old boxes work well; see our post on them.)
- A network. Internet for the content and the clock. A cable is better than Wi-Fi for a wall, and all panels should be on the same local network.
You can mix players: an Android TV box, a desktop app and a Raspberry Pi can be panels of the same wall.
1. Arrange the wall
Make a stage for the wall and tell it how the screens hang. A grid is columns, rows and the size of one panel, in any size, not only Full HD. Bezel is the frame between two screens: that strip of the picture is hidden behind the frames, so a line that crosses from one screen to the next stays straight.
For screens that are not a tidy grid, use a free arrangement and drag each panel to where it hangs. A screen mounted on its side is turned in the software, so it does not matter whether the TV box can rotate its picture. Pick one panel to play the sound; the others play the same picture muted, so the wall never echoes itself. Arranging a wall, in the docs.
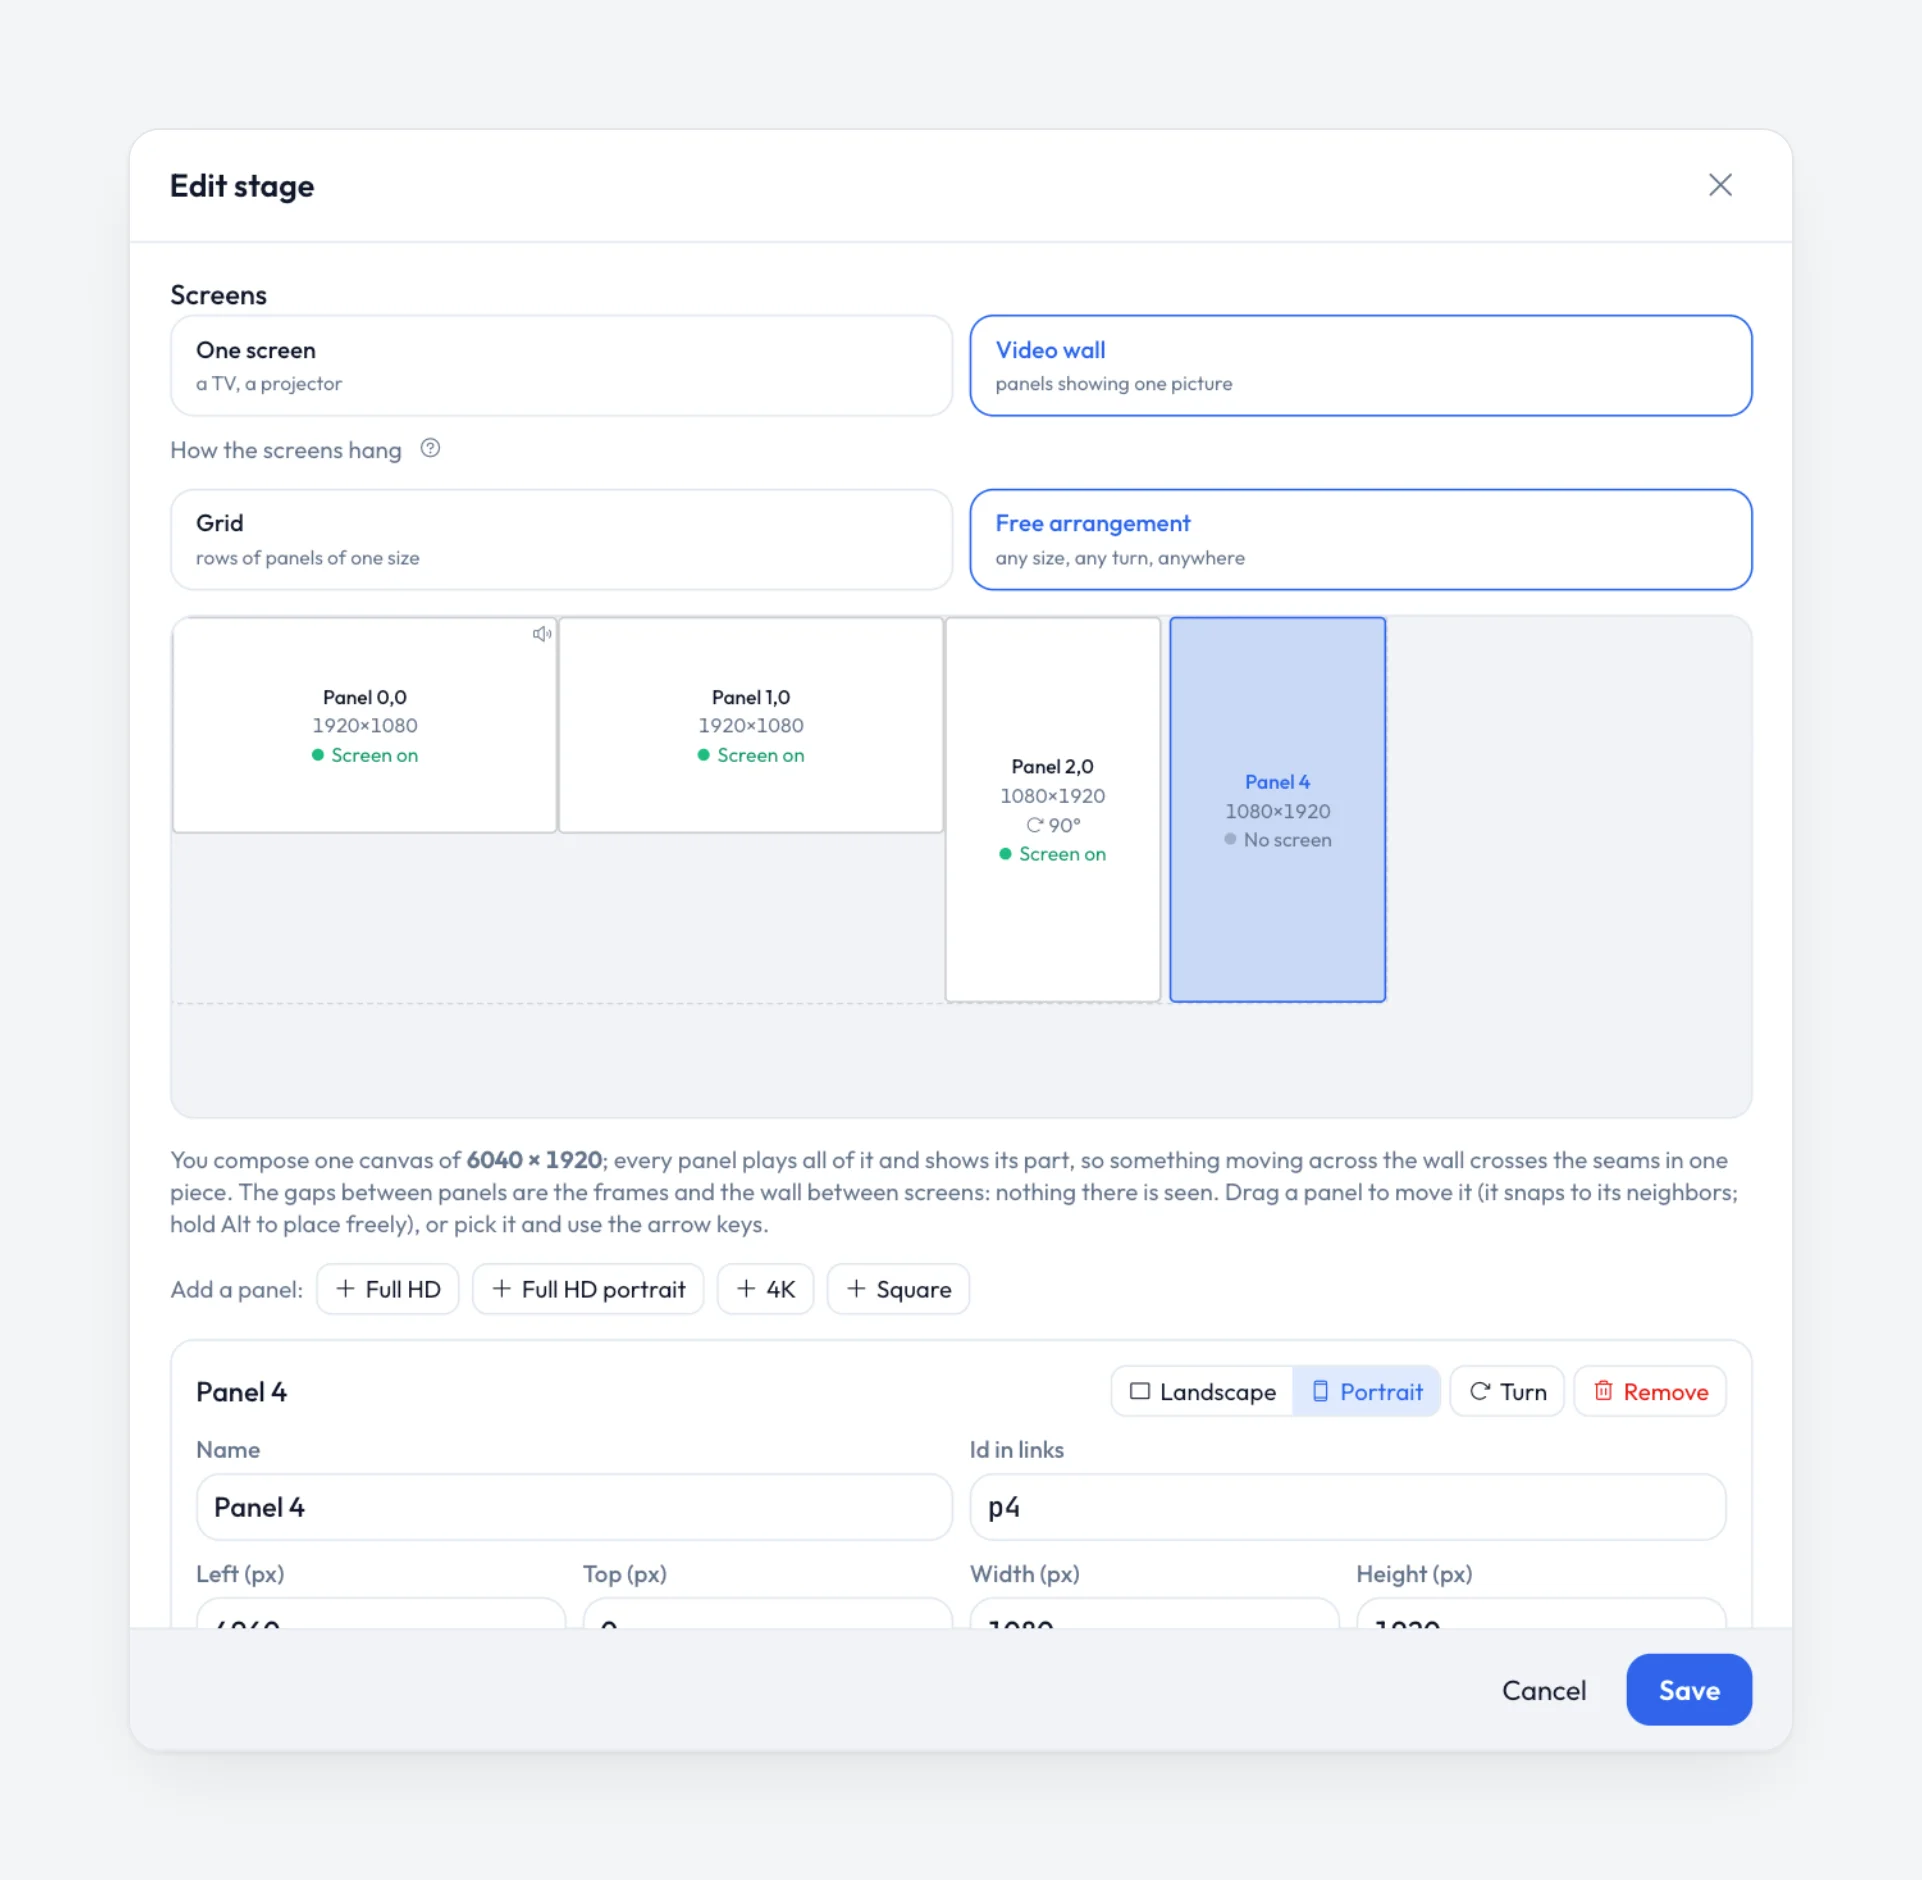
A free arrangement on the stage: two landscape screens, one turned to portrait, and a fourth being added.
2. Put a screen on every panel
Each panel gets its own player. Press Pair a screen, click the panel, and type the code the TV shows. When the players start, each screen shows its panel name for ten seconds: walk along the wall and check the order before the doors open.
Two settings on the screens themselves matter more than anything in the software: set each output to exactly the panel size, and switch off the TV’s overscan or “zoom”. Otherwise the picture is cropped a little on every screen and the seams do not line up. Pairing panels, in the docs.
3. Design one picture for the whole wall
In the scene editor, open Canvas and pick the wall under Design for a wall. The canvas becomes the size of the whole wall, with every screen outlined and named on it. The parts that no screen shows, such as behind the frames or the empty corner beside a portrait screen, are hatched, and a block placed there gets a warning.
A few rules of thumb make a wall read well:
- Let things cross a seam rather than sit on it. A moving title reads fine across a frame; a still word cut in half does not.
- Keep faces and small text inside one screen.
- Use the width. A wall is best at things one screen cannot do: a panorama, a timeline, a speaker next to their slides.
Press F for the full-screen preview, choose the wall, and click a panel to see exactly what that one screen will show. Designing for a wall, in the docs.
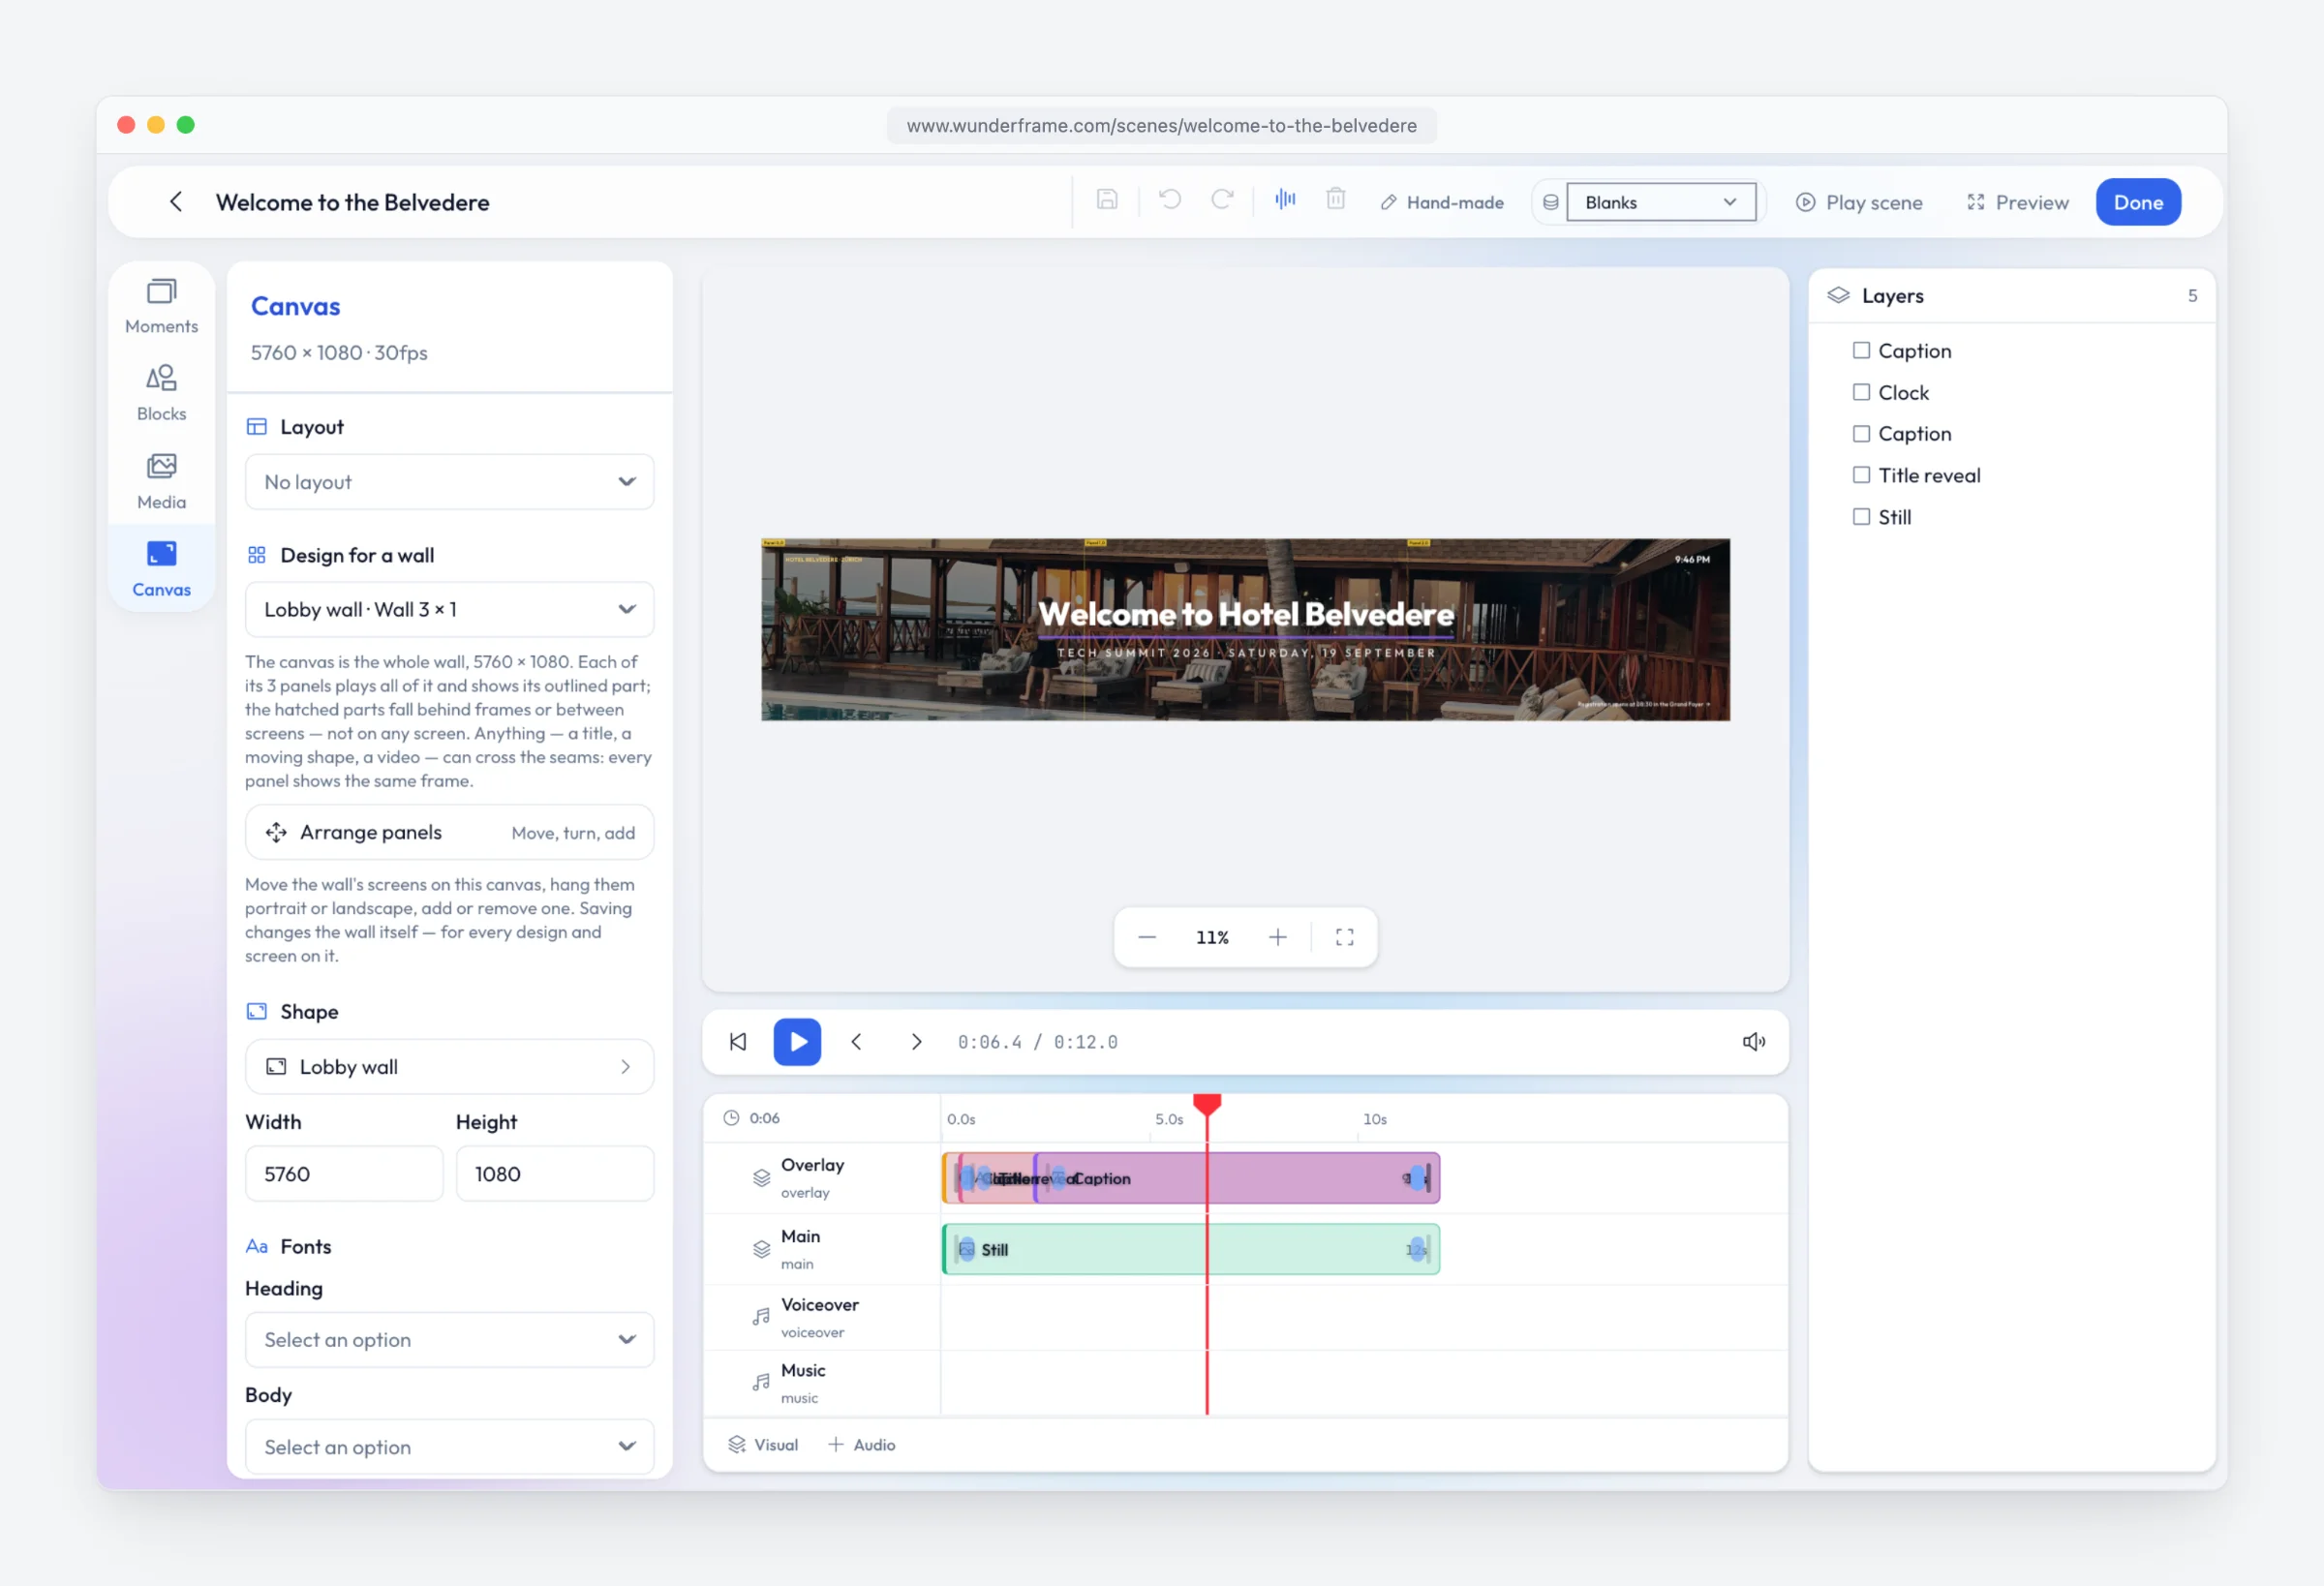
Design for a wall: one 5760 × 1080 canvas for three Full HD screens, each outlined on it.
You can also move the screens right on the design: Arrange panels turns each screen into an outline you drag into place, and saving changes the wall itself. Screens that are already paired keep their panel.
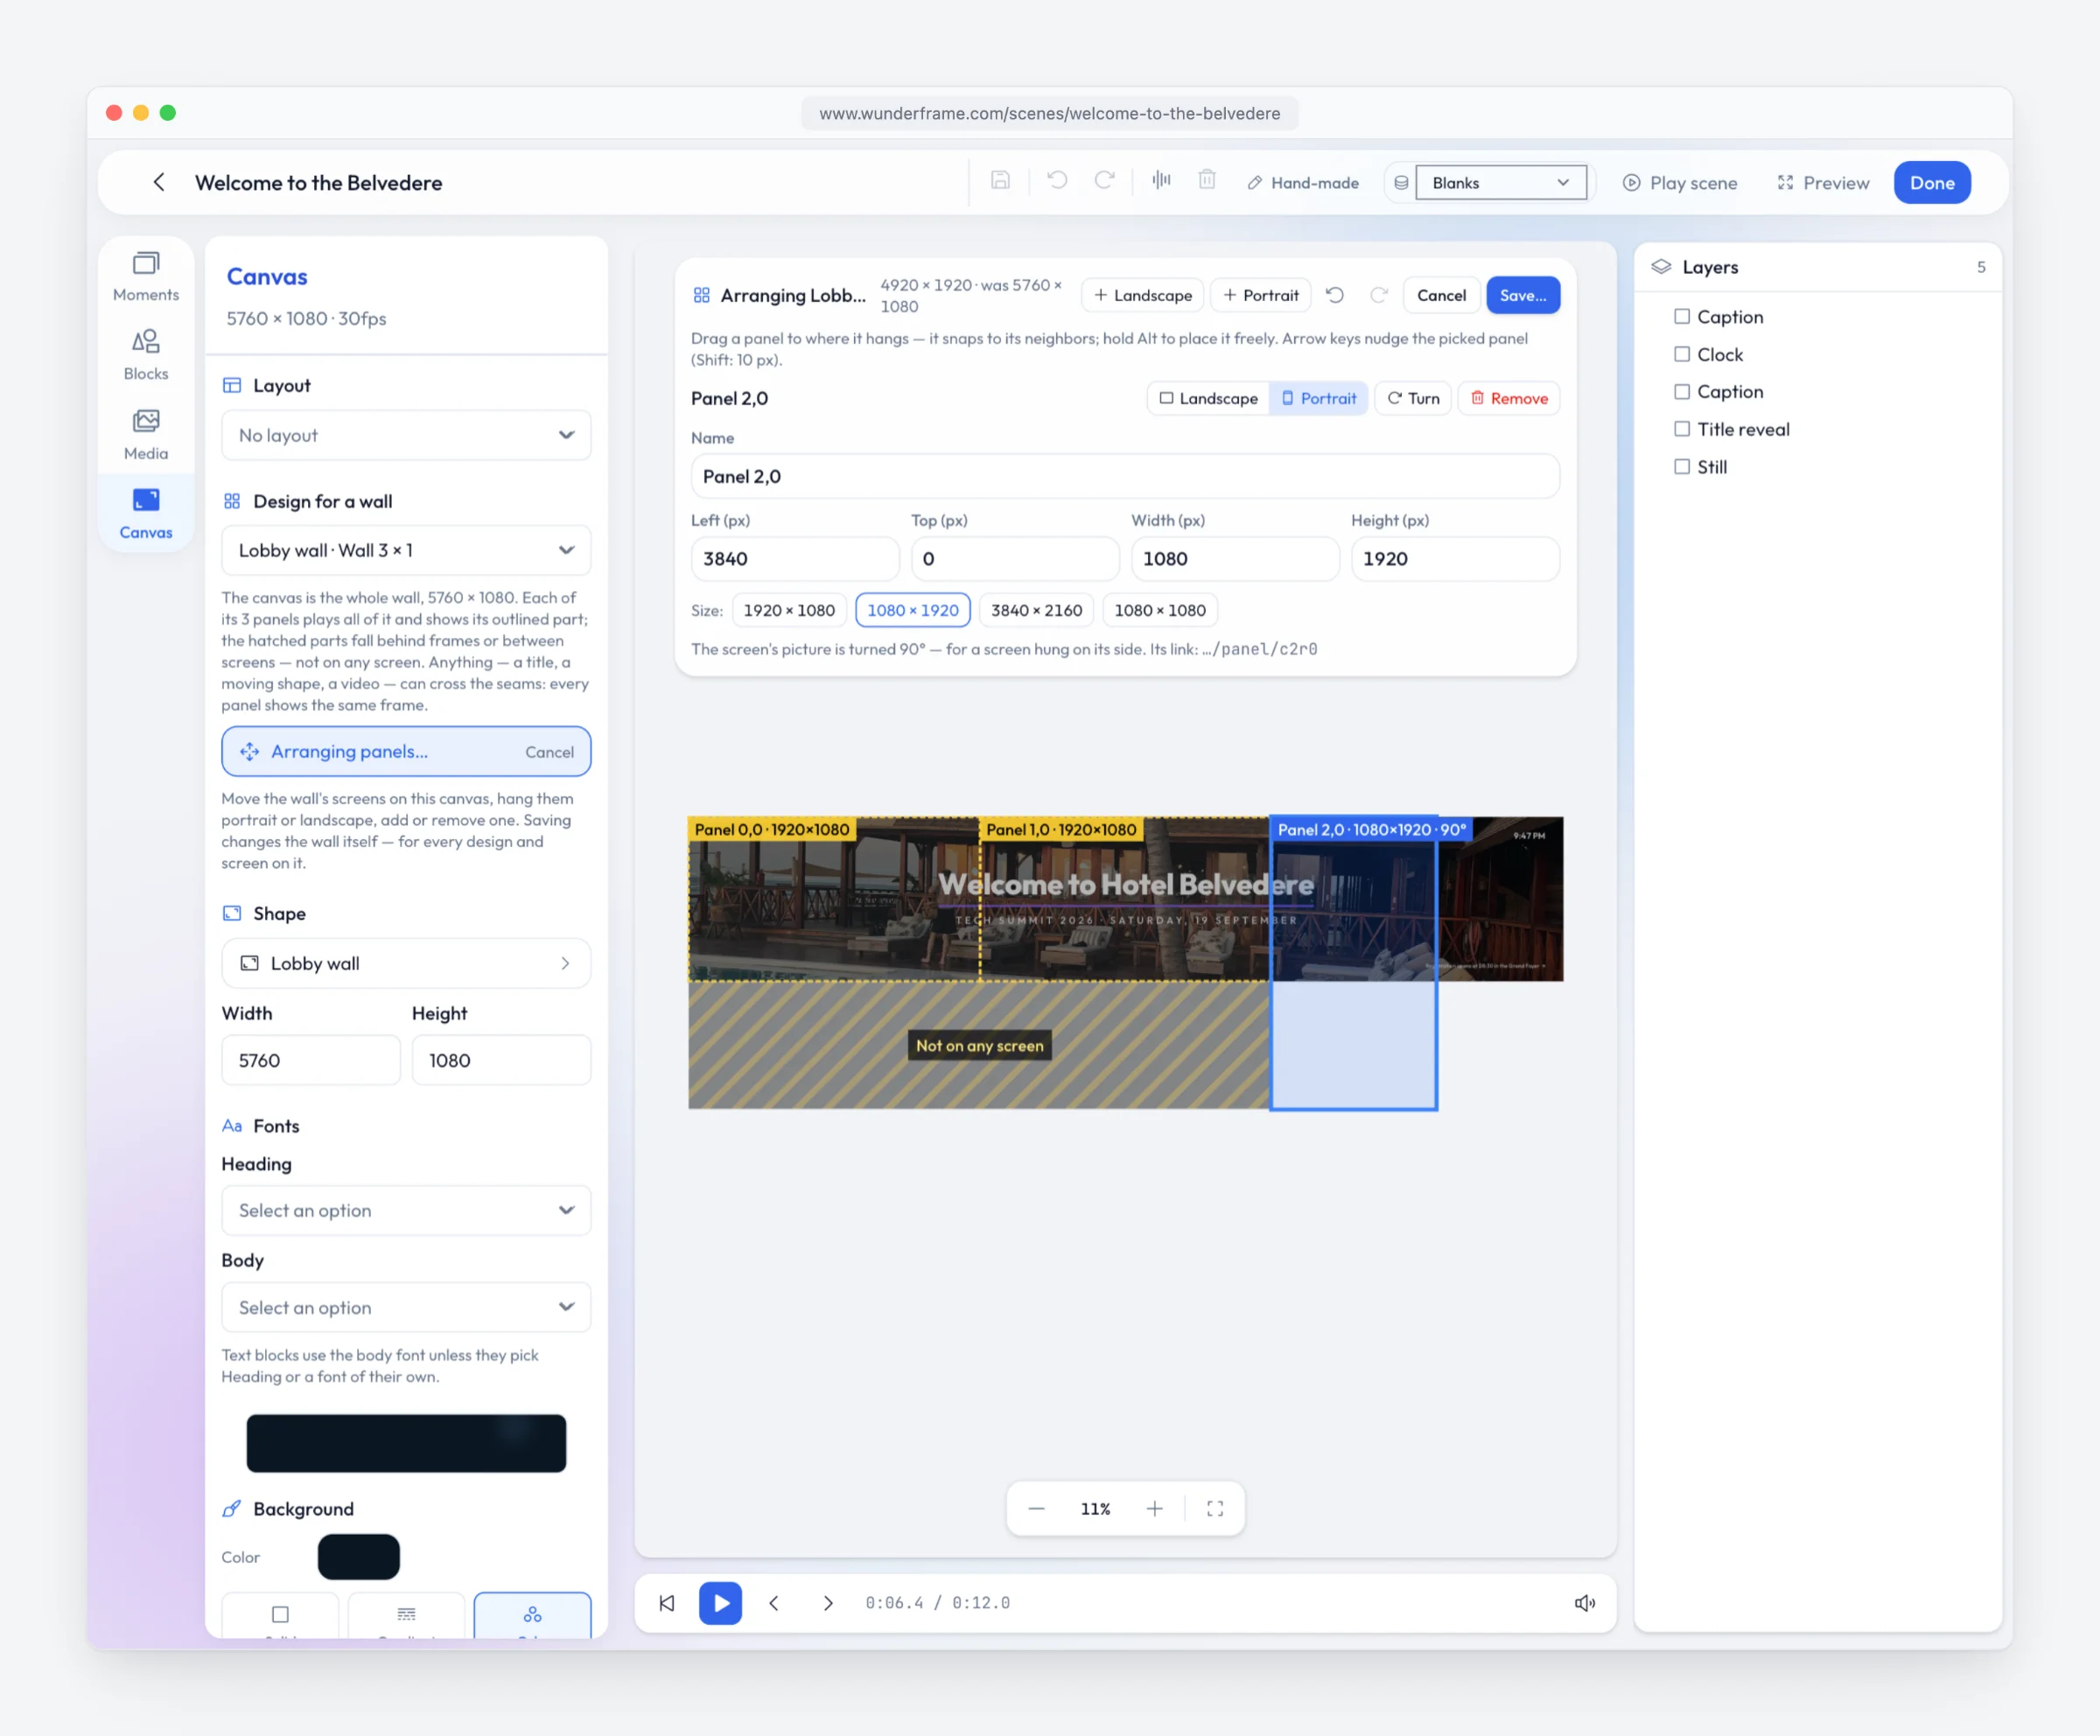
Arrange panels on the design. The hatched part is not on any screen.
4. Video across the wall
Drop one clip on the canvas and stretch it across the screens. Every screen plays the same clip and shows its own part of it. The hard part is timing: on a wall, a fifth of a second between two screens is easy to see, because a moving edge breaks at the seam.
Wunderframe handles that in two ways. All screens play on the same clock, so each scene change lands at the same instant on every panel. And the apps open the next scene’s clips before the scene changes, so every screen starts a video together instead of each one late by however long its own player takes to get going. A clip that loops stays on the same frame on every screen, pass after pass.
One design across a 3840 × 1080 wall during a keynote: the speaker, their slides and the session side by side.
5. How the screens stay in step
There is no controller box. One of the screens is the leader: it decides what plays and the exact moment it starts, and the others follow. If the leader is switched off, another screen takes over within seconds, and nobody has to pick one. The screens talk through the Wunderframe server, and apps on the same local network also talk to each other directly, so the wall stays together when the internet drops.
New content never shows half-loaded: a changed story downloads onto every screen first, and the screens switch to it together once all of them have it. If one screen ever does fall out of step, it catches up by itself within seconds, and Sync wall now on the wall’s card lines up every screen at once, without a reload. How the screens keep in step, in the docs.
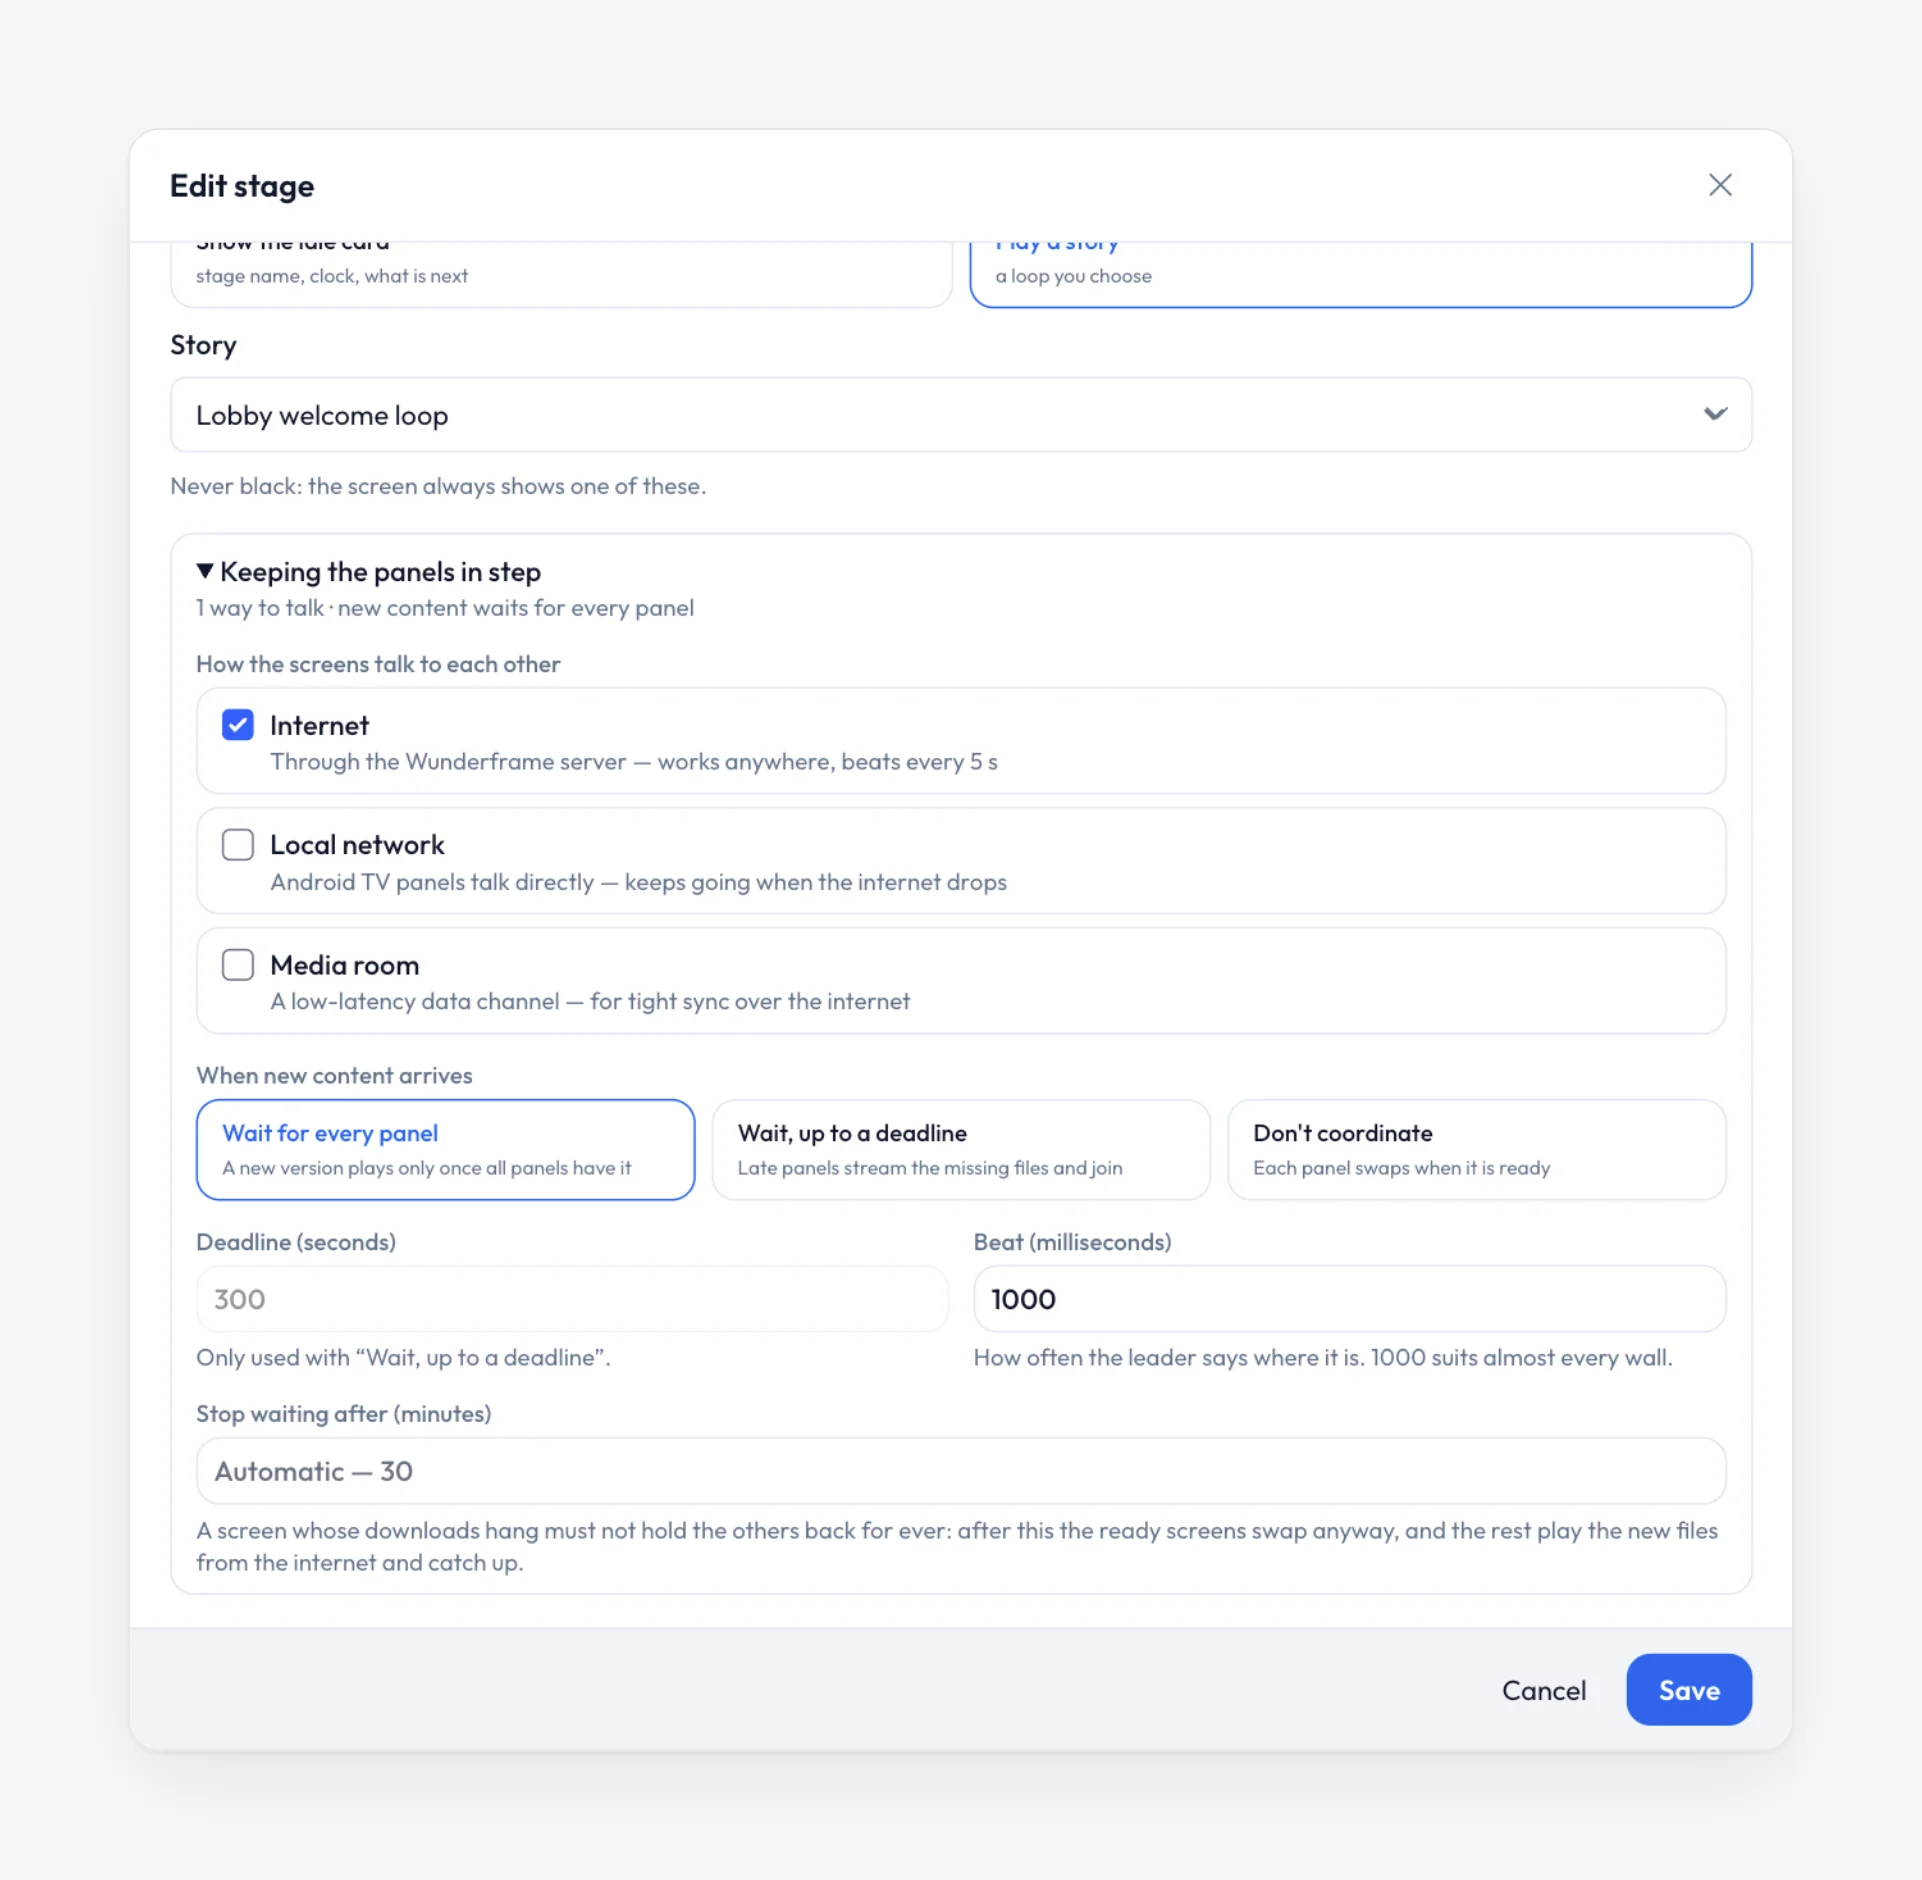
How the screens talk to each other, and what happens when new content arrives, set per wall.
A checklist for the day
- Every output set to the panel size, overscan off.
- Cables for the players where you can; all panels on one network, with client isolation off. The network needs list the ports.
- Walk the wall once when the players start and check the panel names.
- One panel plays the sound.
- Look at the design in the full-screen preview, panel by panel, before the event.
- On Devices, every panel shows the same leader.
- If a screen looks out of step, press Sync wall now.
Everything here is in the walls documentation, with the settings explained one by one.
Related posts
How an event should really run
A wide stage screen, speakers who join from anywhere and an operator with a phone. For a conference, a wedding or a company evening in a rented venue, with little more than a browser, an Android TV box or a Raspberry Pi.
Old Android TV boxes and Raspberry Pis as signage players
Cheap boxes, reliable screens. What an Android TV box or a Raspberry Pi can run, where the limits are, and a checklist for event day.
Clubhouse screens: fixtures, sponsors and a fan wall
A practical setup for a sports club: a fixture board that fills from your spreadsheet, a sponsor loop that treats every sponsor fairly, a fan photo wall on match day — and an honest word about live scores.